Automatic setup:
1. View this web page in Safari on the iOS device you are configuring.
2. Use this form to obtain an auto-configuration profile for your EE mailbox:
And click Allow in the permissions dialog box that comes up. Close the Profile Downloaded dialog box.
3. Open your Settings app and select Profile Downloaded. Then click Install, enter your passcode if prompted, then Install again, and Install a third time. Enter your name and click Next, enter your password and click Next. Now click Done.
When you open your Mail app, you should have full use of your new account.
Removing a mail account:
If you ever want to remove this email account, open Settings and go to General -> Profile (scroll to bottom of page), where you should see a profile named EE Mail User. Click through to the Profile page, then click Remove Profile, enter your passcode if prompted, and finally Remove again.
Manual setup:
If the above method of automatic profile configuration doesn’t work for you, here are the steps for manual account setup.
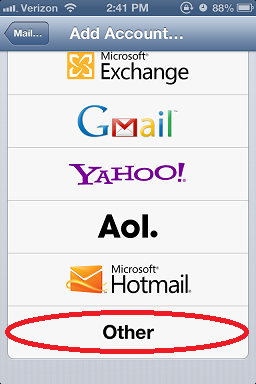
Receiving mail- Go to Settings and then either Accounts and Passwords (iOS 11) or Mail –> Accounts (iOS 10), and click Add Account. Then select Other.

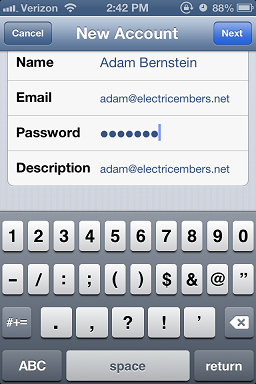
- Select Add Mail Account, and enter your Name, Email address, Password, and Description (can be whatever you like) and tap Next.

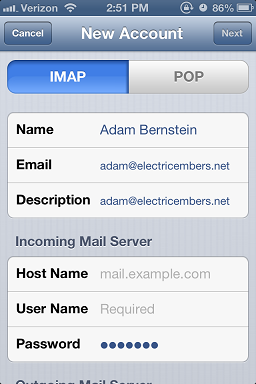
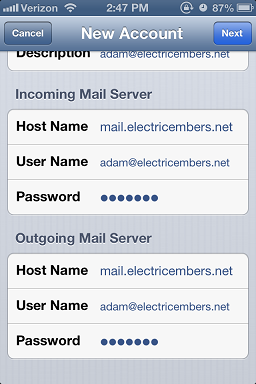
- Select IMAP. Under Incoming Mail Server, enter Host Name mail.electricembers.net, User Name (your full email address), and Password. Enter the same info under Outgoing Mail Server, and tap Next (it will verify.)
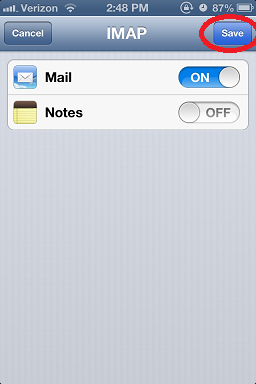
- Tap Save.
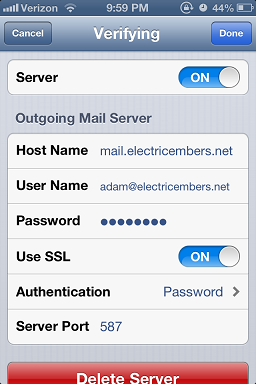
- Return to Settings and then either Accounts and Passwords (iOS 11) or Mail –> Accounts (iOS 10), find the account on the mail accounts page and select it, then tap it again. Then under Outgoing Mail Server, tap SMTP. Find mail.electricembers.net under either Primary Server or Other SMTP Servers, and tap it.
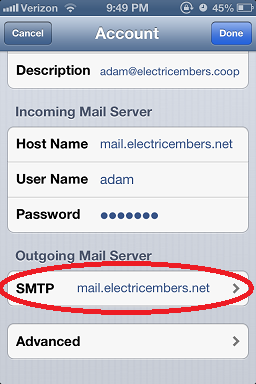

- Confirm Use SSL is On, Authentication is Password, Server Port is 587, and User Name (full email address) & Password are entered correctly. Then tap Done.
